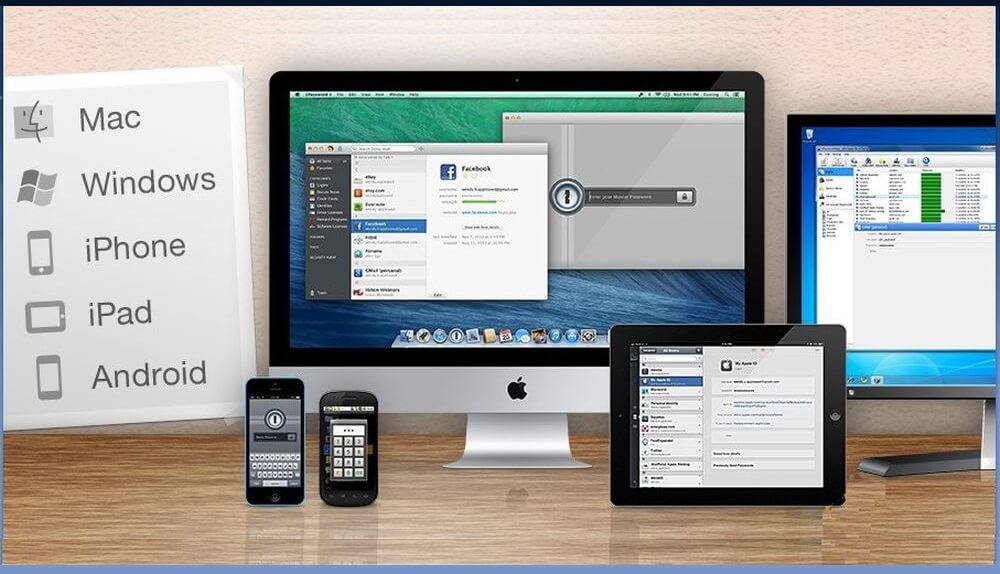
Screenshots can become a huge help when you want to explain technical issues with your device or capture a moment of your digital life. All gadgets let make screnshots in different ways. In this post we’ll show you:
- how to do a screenshot on Mac;
- how to take a screenshot on iPhone;
- easy ways & tools to take screenshots on Windows;
- how to do a screenshot on Android devices.
How to Take a Screenshot on Mac
Mac OS make it super easy to take a screenshot. You don’t need to insert an image into other programs to save it. It’s enough to click a 3-key combination and a screenshot or a part of it will appear on a desktop.
Capture a full screen
To save a screenshot of a whole screen, press ⌘Cmd + ⇧Shift + 3. You’ll hear a shutter sound and your screen picture will appear on a desktop. 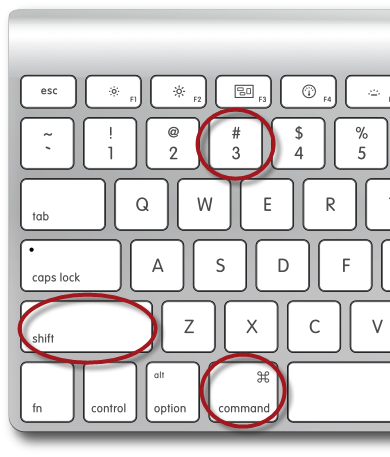
If you need to paste a screenshot right into a document or to a photo editor, you may save the image to desktop and then drag-n-drop it to a document. But there is an easier variant. You can save your screenshot to clipboard and paste into your document skipping the desktop step. If you hold ⌘Cmd + ⇧Shift + Ctrl + 3, the screenshot will be copied to the clipboard instead.
Save selected area
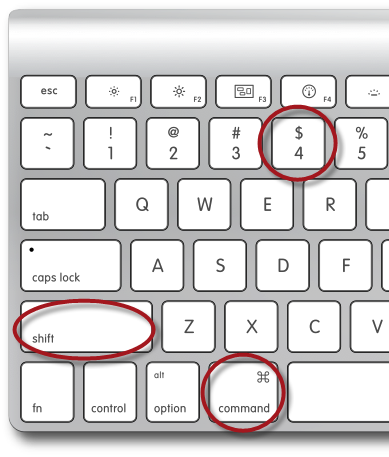
To capture a selected area of the screen, tap ⌘Cmd + ⇧Shift + 4 and select an area you need to printscreen with a cross-hair pointer. A ready file will be saved to your desktop. It’s pretty handy since you don’t need to cut your picture.
Capture open window
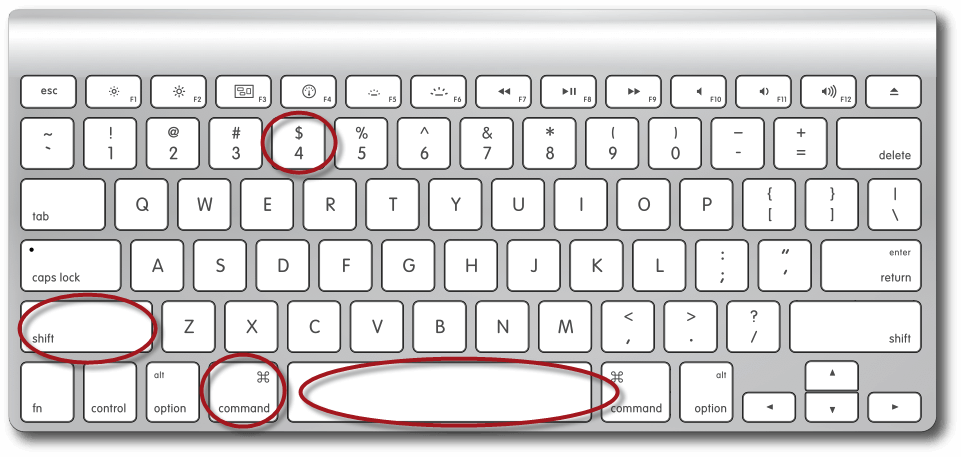
If you want to capture a particular window, simply press ⌘Cmd + ⇧Shift + 4 and Space key. Move a little camera icon to a window you want to take a screenshot of. Click the left mouse button to get an image.
Screenshot with Grab
You can also do screenshots on Mac with a default utility called Grab:
- Go to Applications >Utilities >Grab.
- Run the app and check Finder line. You’ll see Grab options there.
- Choose the one you need and take your screenshot. Please note, the file won’t be automatically saved.
- Click File >Save or Save as… to keep the picture.

How to Take a Screenshot on iPhone, iPad, iPod
Taking screenshots on iPhone is very easy and doesn’t require any special apps. You need just your iPhone and fingers.
Here are the steps to do a screenshot on iPhone:
1. Launch an app which you want to capture.
2. Put one of your fingers on Home button and the other on On\Off button.
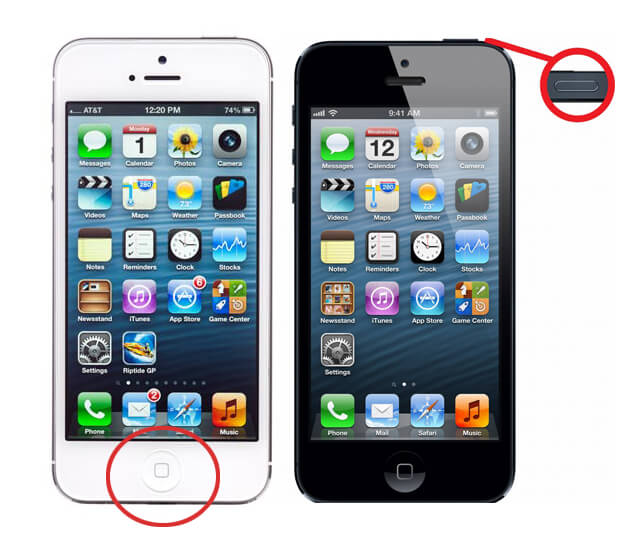
3. Press these two buttons at the same time. If you hear a shutter sound, your screenshot is ready.
4. Go to Camera Roll to check it. Here we are, your screenshot is ready!
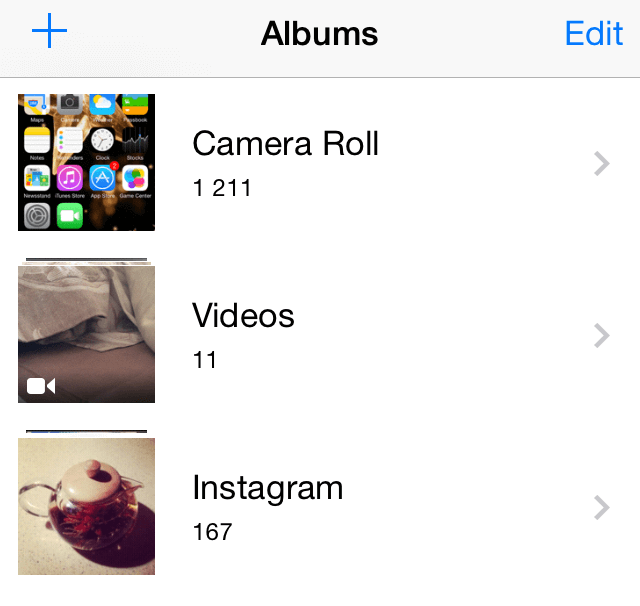
This means works equally well in iPad and iPod.
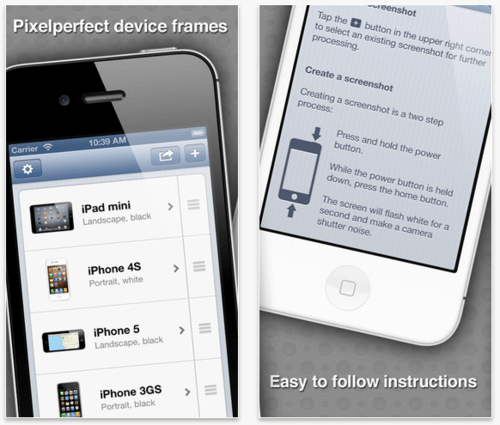
If you want to make your screen photo look more stylish and professional, don’t miss Screenshot Frame Maker app. It’ll add frame of your or chosen device to your screenshot. All you have to do is to add a ready screenshot to the app using + button and choose a frame. When the job is done, save a ready pic to your camera roll or share on social networks.
How to Take a Screenshot on Windows PC
For Windows users, to do a screenshot is a bit more complicated task. The most popular way to do this is to press PrtScr button on your keyboard.
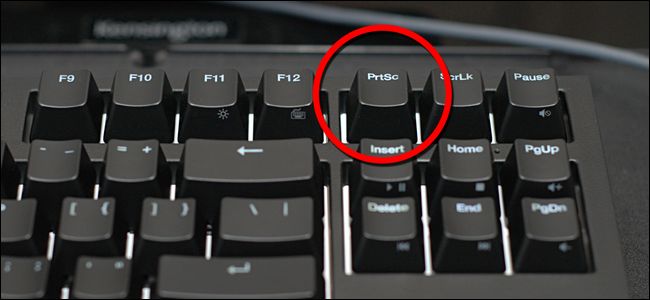
It will capture the entire desktop. To get a screenshot of the active window, hit Alt + PrtScr.
Then you need to paste the screenshot somewhere as it’s saved to your clipboard. The standard way is to open MS Paint and hit Ctr + V to insert the image.
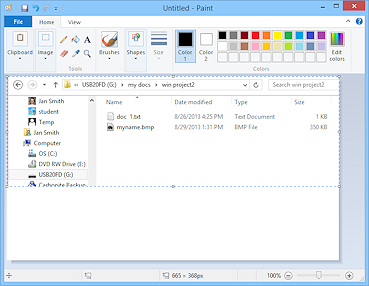
Cut unnessecary parts, do the editing if needed and save the image as JPG or PNG.
SEE ALSO: How to Trim a Video
Alternatively, you may paste the screenshot into MS Word and save it as a DOC file.
Best Free Screenshot Taking Tools for Windows
In case you want to skip the process of pasting into a third-party program, you may use the following tools which do all the job for you.
Snipping Tool
If you run Windows Vista or later, you can use the default utility called Snipping Tool:
- Run the program by clicking Start > All Programs > Accessories > Snipping Tool.
- Then click New and select an area you need to printscreen. You may also choose a type of snip: free-form, rectangular, window or full-screen.
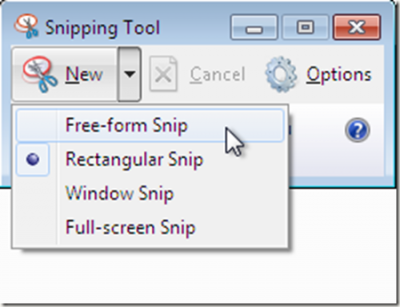
- When you click on the area, the screenshot will appear in the program for further editing.
- Use Pen or Highlighter to mark important parts of the image. If you made a mistake use Eraser to remove any unnecessary marking-outs.
- After you finished the editing, click Save button to save the image in JPEG, GIF, PNG, or HTML format.
Screenshot2Disk
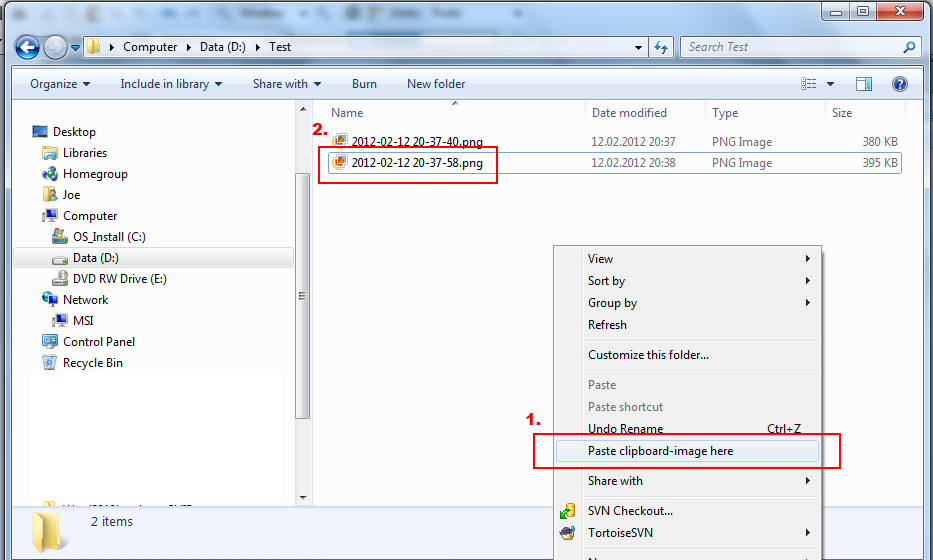
Screenshot2Disk is a must have application in case you need a simple JPEG or PNG screenshot taking tool without any additional features. The program integrates in right click mouse menu. So when you want to take a screenshot just press PrtScr key, then right-click on a desktop or in any folder and choose Paste clipboard-image here. That’s all! Fast and easy.
Greenshot
Greenshot is a light-weight application for taking screenshots of a selected area or full-screen. To take a screenshot with it:
- Install and run Greenshot.
- Hit PrtScr button and choose an area you want to capture.
- Once you do it, the tool will show you the menu with saving options: Save as…, Open in the editor, Copy to clipboard, Send to printer, etc.
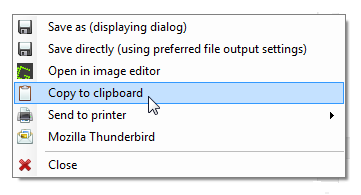
You can set a destination folder, default image format (JPEG, GIF, PNG, BMP) in Preferences by right-clicking on a tray icon. One more interesting feature is has a special sound and flashlight effects that will be appreciated by photography amateurs.
PicPick
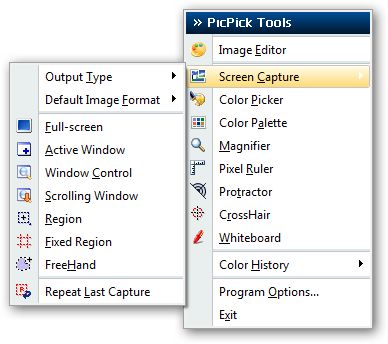
PicPick describes itself as “all-in-one design tools,” and it really is. It contains: an image editor, color picker, color palette, magnifier, pixel ruler, protractor, crosshair, whiteboard, and screen capture. The latter is pretty good and functional. With PicPick, you can screen capture the whole web page or, for example, PDF document in one image.
- Install and launch PicPick.
- Go to Screen capture > Region if you need to printscreen a particular area. In case you need a full-screen image just click on Print button and the picture of your desktop will appear in PicPick editing window.
- If you don’t want to change the image, save it as it is by clicking Save. PicPick saves images in BMP, JPEG, PNG, and GIF formats.
Screenshot Captor
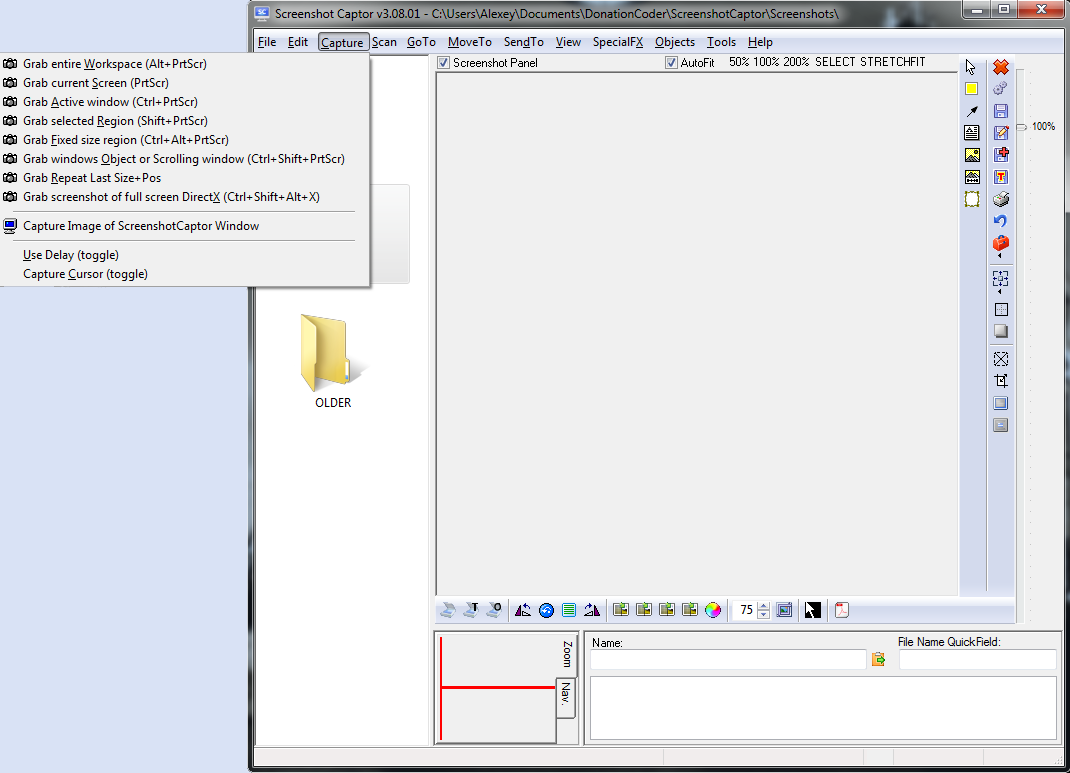
Screenshot Captor developers say their software differs from other screenshot utilities in several ways:
- ability to embed textual comments in files, watermarking, captioning;
- lots of capture modes: Multimon (multiple monitors), Desktop, Active Window, Region, Windows Object, Scrolling Capture;
- perfect capture of Windows 7 partial transparency effects;
- easy automatic or on-demand uploading of screen imagesto a wide variety of image hosting services (Imageshack, Flickr, ftp, etc.).
To do a screenshot wit it, you need:
- Run the software.
- In Menu choose Capture and specify the desired screenshot format.
- After the screenshot is ready, click Save as.. and select the format: JPEG, GIF, TIFF, BMP, PNG, PDF.
The only disadvantage about Screenshot Captor is that although it’s free for personal use you should contact the developers to get a license key. If you don’t do it , you’ll get reminders all the time you run the program.
How to Screenshot on Android
In first Android version the process of screenshot taking was a real pain. However, since Android 4.0 (Ice Cream Sandwich) this functionality is natively built into the operating system.
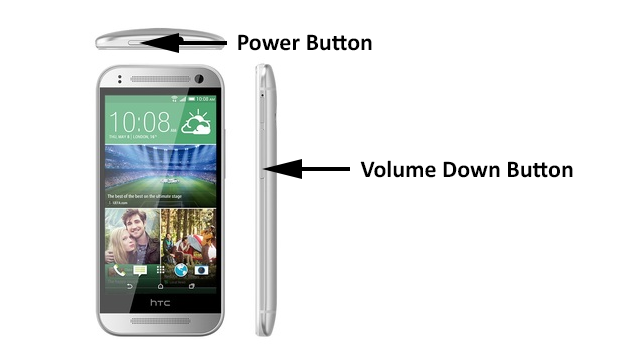
On most Android phones and tablets, you can take a screenshot by holding down the Power button and the volume-down button simultaneously. Press these buttons down for 1-2 seconds until your screen flashes. The picture is saved in your Gallery > Screenshots folder.
The process differs on some phone models, though. For example, if you own a Samsung Galaxy phone or other device that has a Home button, you need to hold down Power + Home buttons to make a screenshot, just as it’s on iOS.
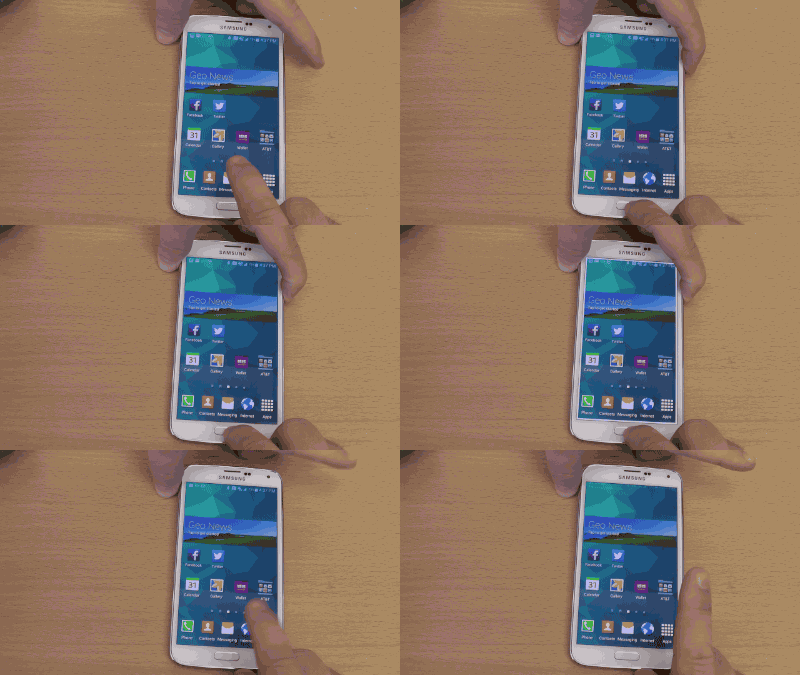
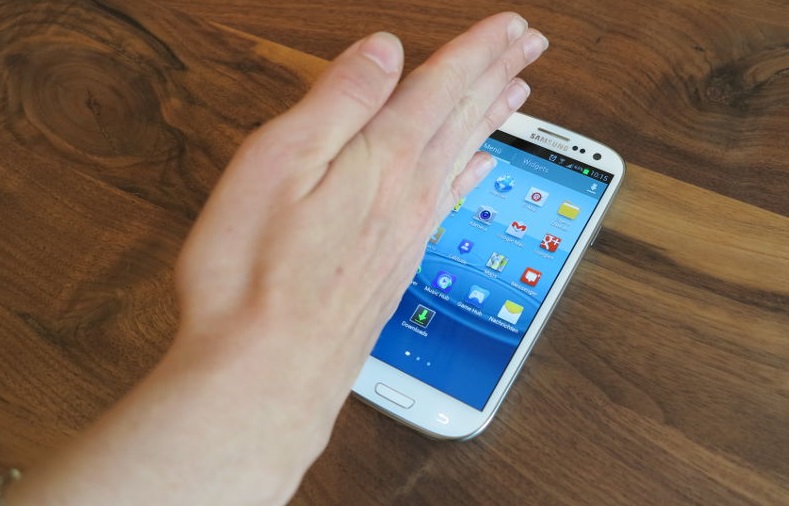
This is one more method to do a screenshot on Samsung Galaxy S 5 or later. Capture the screen by swiping the edge of your hand across if, from side to side, keeping in contct with the screen. Just make sure that this option is enabled: Settings > Motion > Motions and gestures > Palm swipe to capture.
What is your preferred method of taking screenshots? Tell us in comments.

