Both subtitles and captions are used as a textual representation of a video’s soundtrack. Although they look pretty much alike, they are not the same thing. One thing mostly displays the text that is said by a movie character. Usually, they are added to a film in a foreign language for better comprehension. Captions in their turn are used to display all the sounds that take place in a movie like knock at the door, screaming, telephone ring, and serve to aid deaf and hearing-impaired audiences.
Depending on your scope, you can add either script or captions to your movie. Here are some tools that will help you.
Add Text with Google Drive
Google Drive is famous as a cloud service that can keep your data and give you access to it from any device and from all over the world. Only a few users know that Google Drive can also help you add captions to video. It’s easy and absolutely free. That’s how you can do it.
- Step 1: Sign in or sign up to drive.google.com;
- Step 2: Click New ->File Upload and select a video that you want to add captions to;
- Step 3: When the video appears in your Google Drive, click the More sign and choose Manage caption tracks;
- Step 4: Now, click on the Add new caption tracks option;
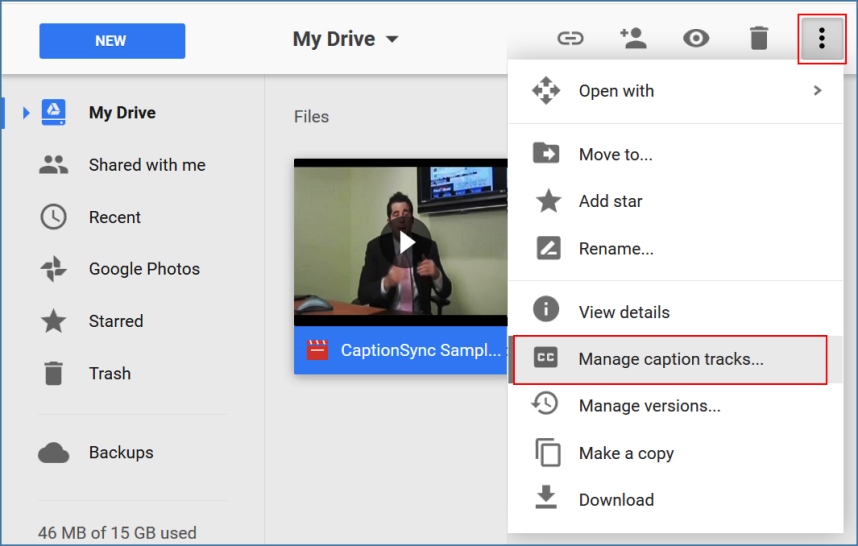
- Step 5: Select your caption file in SRT format;
- Step 6: Choose the language of your new captions and type a title for the captions track;
- Step 7: Click Upload to add captions to your video.
It is a convenient and simple service that provides an option to add ready captions. In case, you want to switch them off, simply go to More -> Manage caption tracks, find your caption track and click to switch it off.
Add captions with YouTube Editor
SEE ALSO: Introduction to Video Editing on YouTube
SEE ALSO: YouTube Upload: Tips, Specs, Limits & Formats
YouTube provides several ways of adding captions and notes to your video. It can be either annotation that may look like note, words or speech bubble, or captions. Read the following paragraph and try to add captions to your video online:
- Step 1: Register on YouTube with the help of your Google accounts;
- Step 2: Upload your video;
- Step 3: Open the video and click Annotations or CC button under it;

- Step 4: If you choose annotation, then set its type, insert the quotation and alter it to your taste. Don’t forget to tune the time duration! In case you want to add material or captions, the 1st hing to choose is the language.
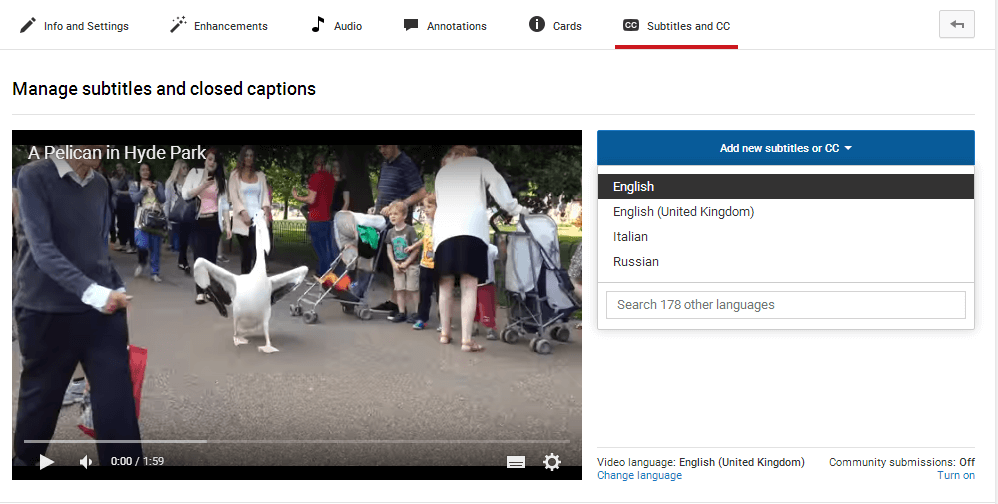
- Step 5: Now choose whether you want to upload a ready text or captions file, transcribe and auto-sync your video or create new file right on the way.
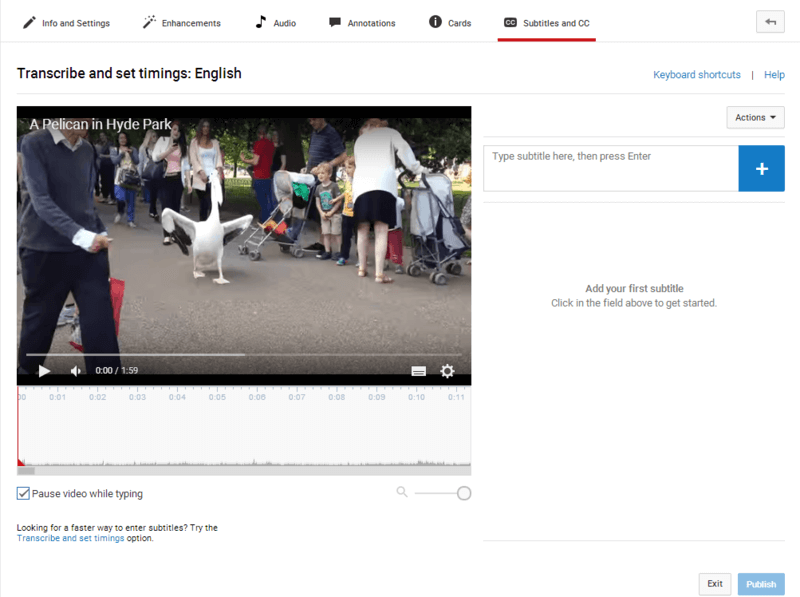
- Step 6: When the movie is ready, click Saved.
YouTube Editor comprises many features to make your video clip unforgettable. However, it is an online editor. If your Internet connection is slow, you will need a lot of time to save all the changes. If you need to save your edited video offline, download YouTube video on Windows and Mac free.
SEE ALSO: How to Cut Unwanted Video Parts
Add Captions with Pinnacle Studio
Pinnacle Studio is a quite complicated video editor with various features that may require some additional skills from you. It allows its users to add captions to movies and short videos.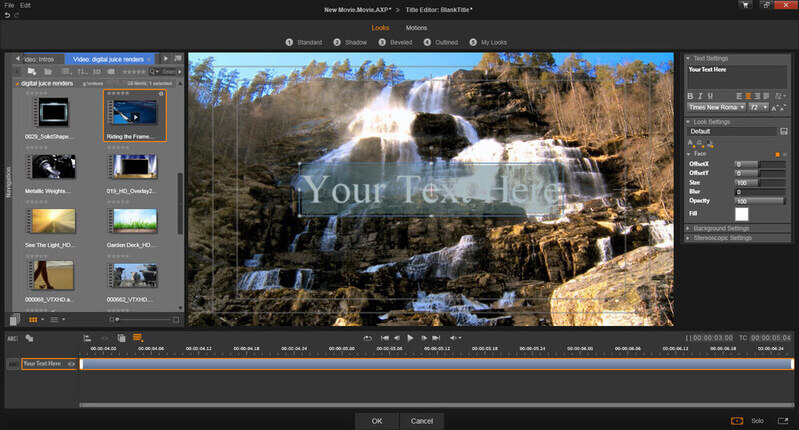
To add script to a video with Pinnacle Studio, follow our simple instructions:
- Step 1: Download Pinnacle Studio.
- Step 2: Add a video clip;
- Step 3: Choose Titles;
- Step 4: Select the type of the title and its place. Put it in the editor line.
Pinnacle Studio is smart software with numerous excerpt options. However, it is quite heavy for PC, and littered with programs. Moreover, free version is available only for 30 days.
Add Captions and Words with CaptionMaker
CaptionMaker is one more tool that will help you create captions on Windows and Mac. The software is not free, but demo version is available. Thus, you can download it and try the majority of options to make the final decision. CaptionMaker is highly customizable. Here you can change message font and background color, choose the number of rows and their position and many more.
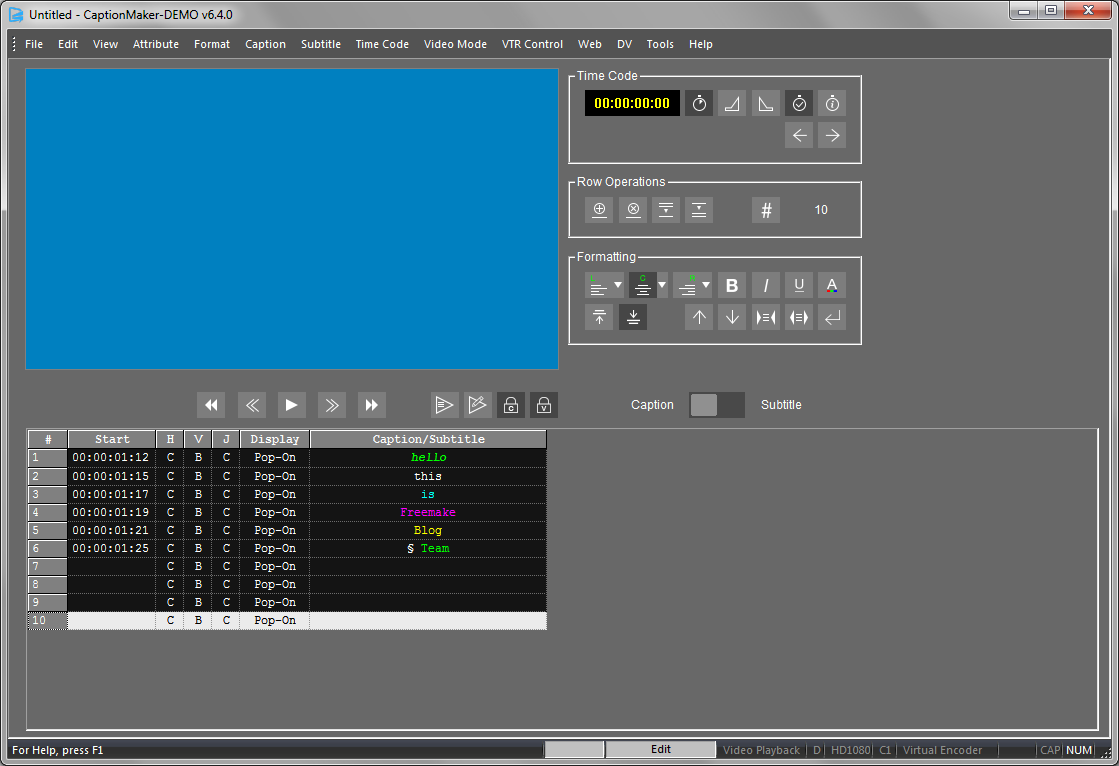
To make close captions with CaptionMaker:
- Step 1: Download CaptionMaker for your PC or Mac here.
- Step 2: Run the software on your PC or Mac.
- Step 3: Import you video file via File -> Open Movie.
- Step 4: Set the necessary time for your caption.
- Step 5: Type your material in Caption/Subtitle field.
- Step 6: Select the style for your captions (font, position, etc).
- Step 7: When you are done, click File -> Save to save your movie with captions.
CaptionMaker is a great tool with a good number of settings. So if you want your captions to look professional, don’t skip it.
Add Closed Captions and Text to Video with Aegisub
Aegisub is a simple cross-platform story editor like Notepad that will help you make close captions and content in a couple of clicks. The software has a built-in video player, thus you won’t need to open your video in a separate video player.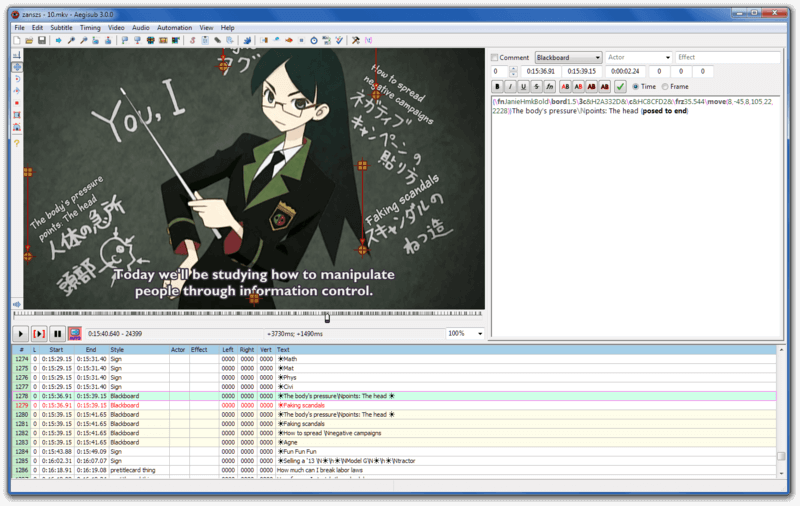 Follow these steps to add text or captions to your movie:
- Step 1: Download Aegisub for free here.
- Step 2: Install and open Aegisub.
- Step 3: Set the time interval for your document.
- Step 4: Enter the wording you want to display on your movie.
- Step 5: After you typed the reading, click the green arrow to save it.
- Step 6: When you complete your job, click File -> Export as and save your subtitles in .srt format.
Aegisub is a tiny and easy-to-use caption maker that we’ll let you add text to your movies without getting deep into tech side of file creating.
And what video editor do you use to create closed captions and notes? Share it with us in comments below.


