When you need to make a photo collage, you turn to graphics editors. There is no need to try a sophisticated photo editor with a set of useless functions. There are dozens of free and easy-to-use programs that will help you combine pictures in a couple of clicks. Check the best collage maker software that we have chosen for you.
SEE ALSO: 5 Free Slideshow Makers for Amazing Slideshows
SEE ALSO: Top 10 Photo Collage Apps for Any Purpose
Fotor
Fotor is free and powerful software for outstanding collages. It has plenty of ready frames for up to 9 pics that you can place vertically, horizontally or in free-style. To create a collage with this software, you should:
- Download and install Fotor on your PC.
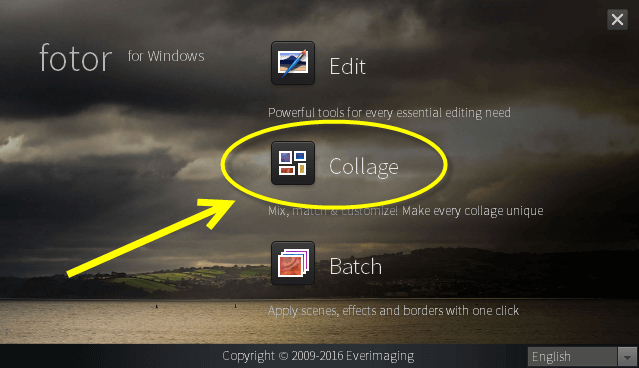
- Run the program and choose Collage option.
- Add your pics via the +Add button.
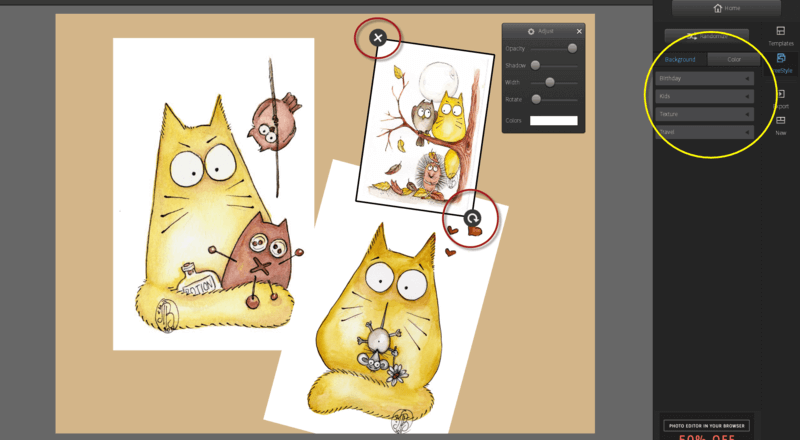
- Choose one of the templates in top right corner. There are special geometric templates for up to 9 pics. You may also click free-style tab and rotate your photos as you wish by clicking and holding the round arrow sign.
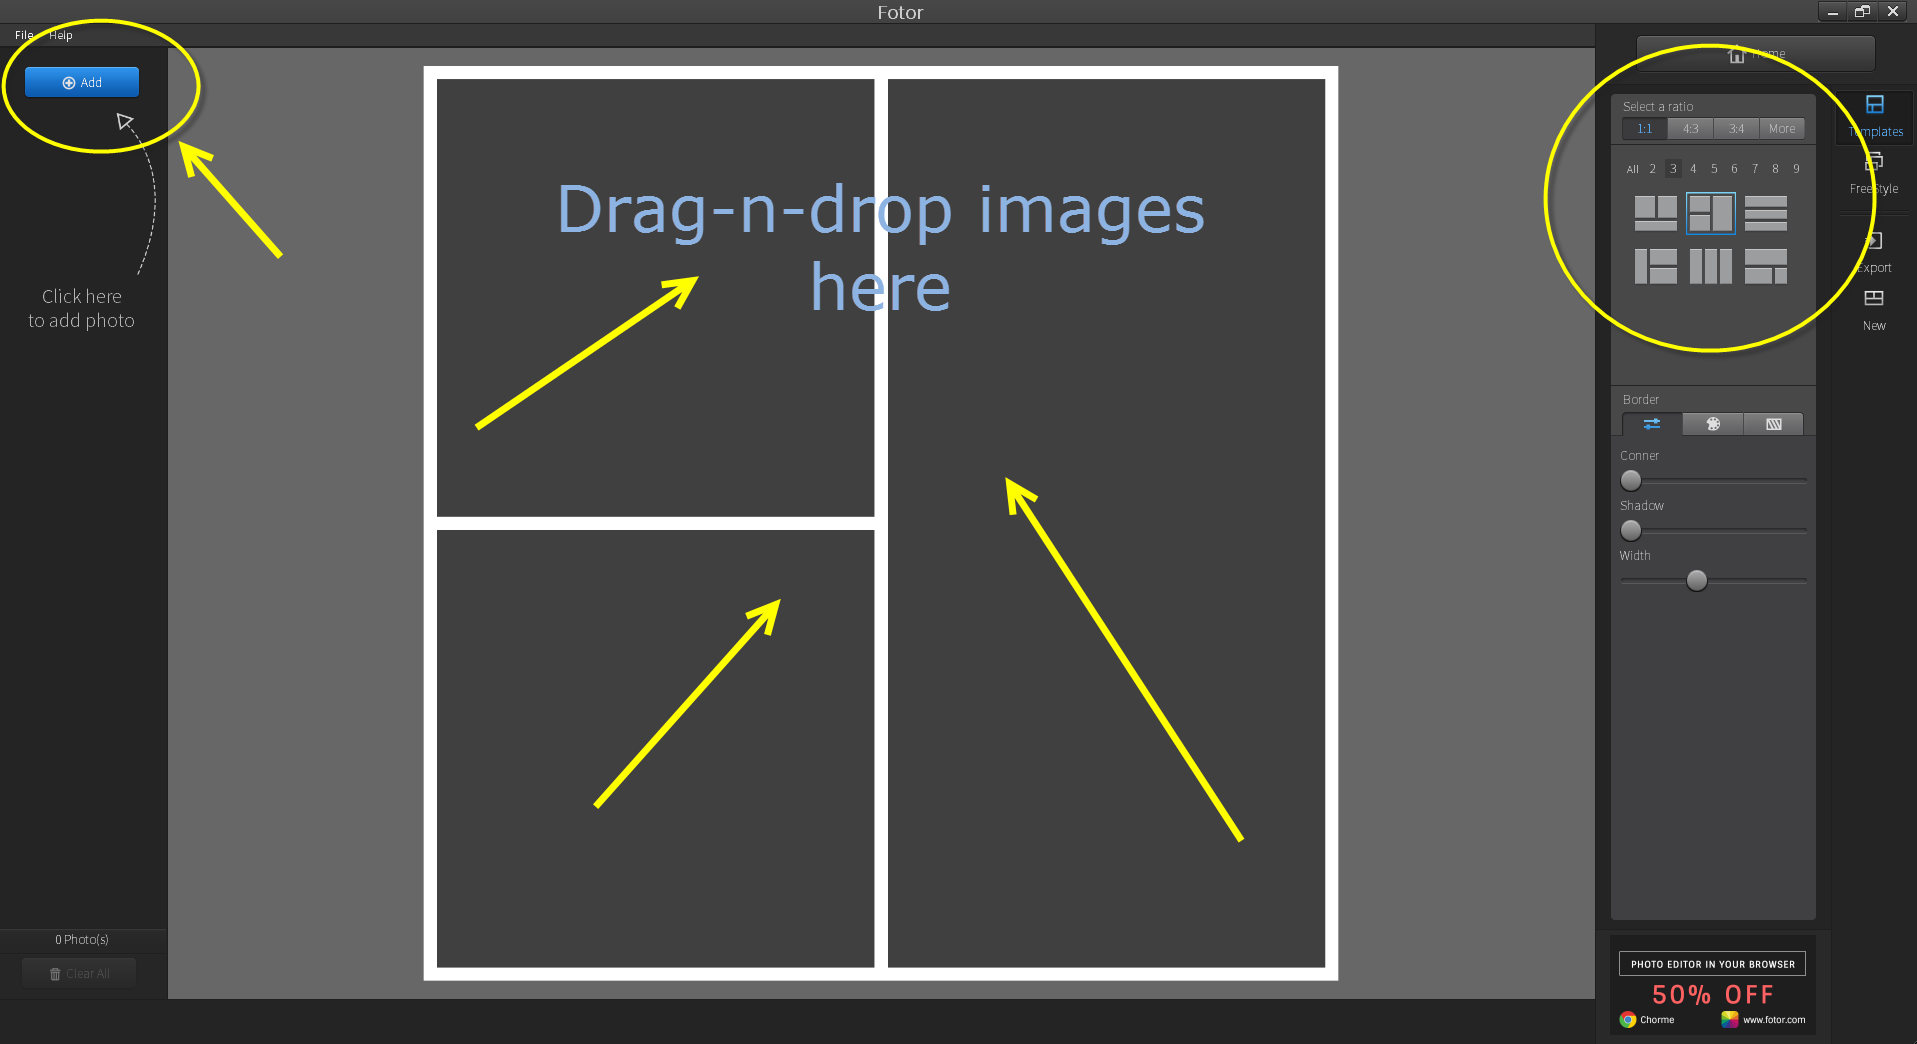
- When you are done with the template, drag-n-drop your images in the corresponding fields. For free-style, choose a background type in the background tab and place your pics in the way you like.
- Customize geometric template border by changing its color or texture. You may also make it thinner or thicker, round the corners and add shadows.
- To save the collage, choose the Export button and select whether you want to save the image onto PC or share in one of the social networks (Facebook, Twitter, Flickr).
PhotoScape
SEE ALSO: PhotoScape: Great Effects, Frames & Animated GIFs for Your Photos Free
PhotoScape is a pretty famous free photo editor. However, it not only lets you edit your pics and turn photos into masterpieces, but create a sweet collage of them. Let’s see how you can make a collage with this tool:
- Download and run PhotoScape on your Windows based PC.
- Go to the Combine and choose a necessary folder with pictures in top left corner.
- Select the photos you need, drag-n-drop them onto a white line at the top of the software.
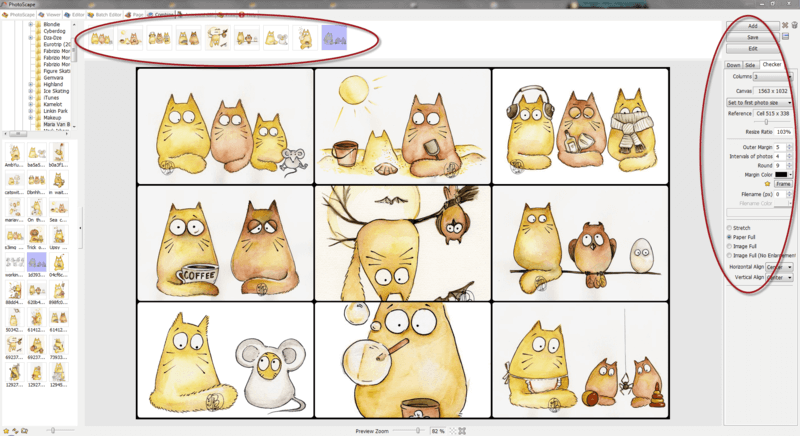
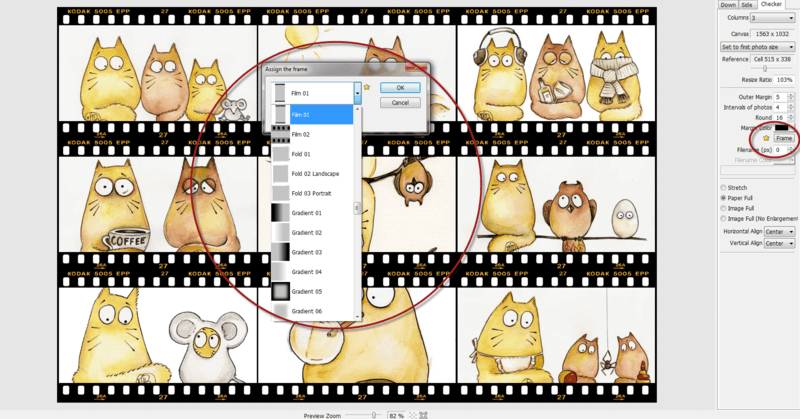
- In the right column select the desired collage orientation: Down, Side or Checker. For the latter, choose a number of columns.
- Select picture size.
- To add a simple frame, set Outer Margin, Interval of photos and Margin Color parameters. To make the corners round, use the Round option.
- If you want an artistic frame, click the Frame button and select the one you need.
- As soon as you collage is ready, click the Save button to save it onto PC.
SEE ALSO: Pixlr Editor – Fun and Powerful Photo Editing Online
Windows Live Photo Gallery
Windows Live Photo Gallery is a part of Microsoft Essential tools and comes by default with modern Windows systems. The collage making options are not numerous. However, if you need to create something plain and make it fast, here is the procedure:
- Go to Start and choose Photo Gallery app.
- When the app opens, select pictures that you want to add to your collage.
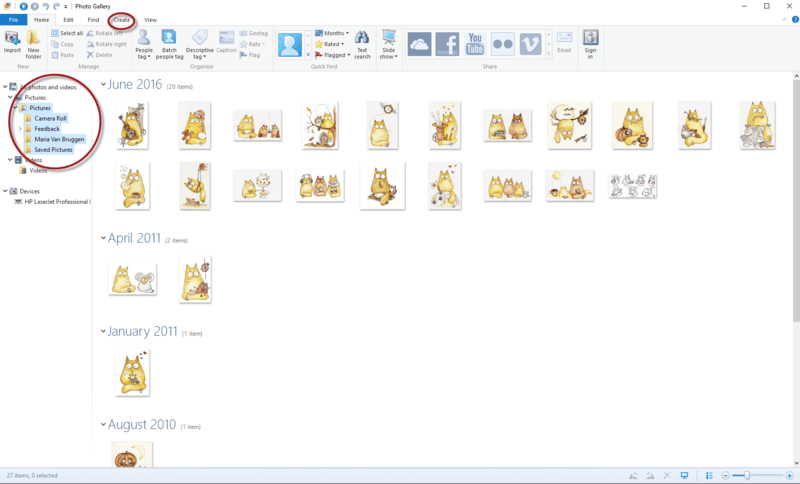
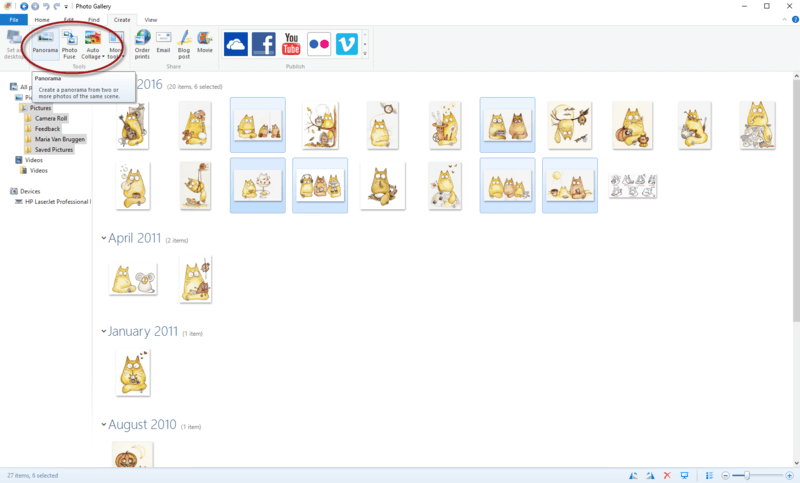
- Then go to the Create tab and select Panorama option. The software will automatically stitch the photos together and show you the result. Alternatively, you may choose Auto Collage option. This one is available for collages with at least 7 pictures. Again, the software will create a collage automatically.
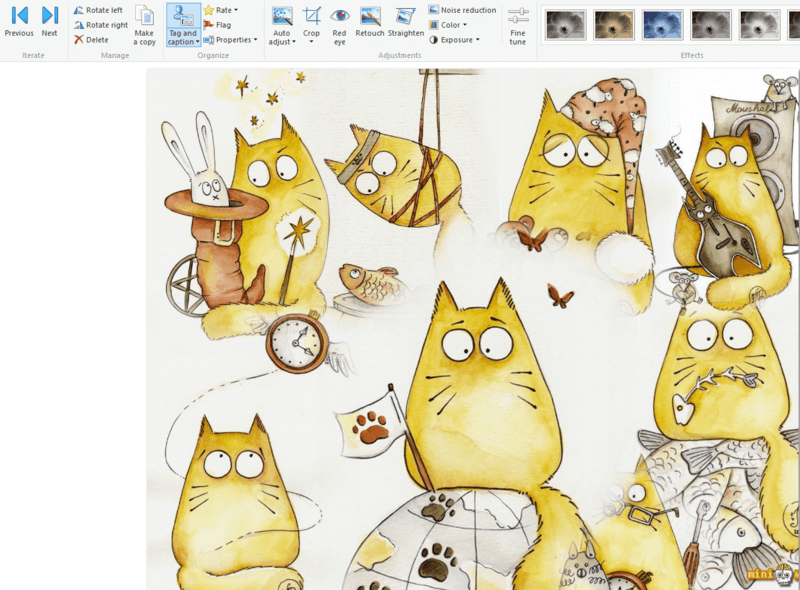
- When the collage is ready, use the editing options to crop it or adjust colors.
- Save a ready pic onto your PC.
Smilebox
SEE ALSO: Smilebox: Make Cool Collages, Ecards, Slideshows & Invitations
Smilebox is a great tool that helps you create printable collages for your nearest and dearest. There are two options: a free one and a paid one with a bigger number of ready templates. Please note, that although Smilebox is a desktop app, you should be connected to the Internet while using it. Now let’s see how to create a collage with this collage maker:
- Download and install Smilebox on your PC.
- Run the software and add your pics via the Get Photos and Videos button.
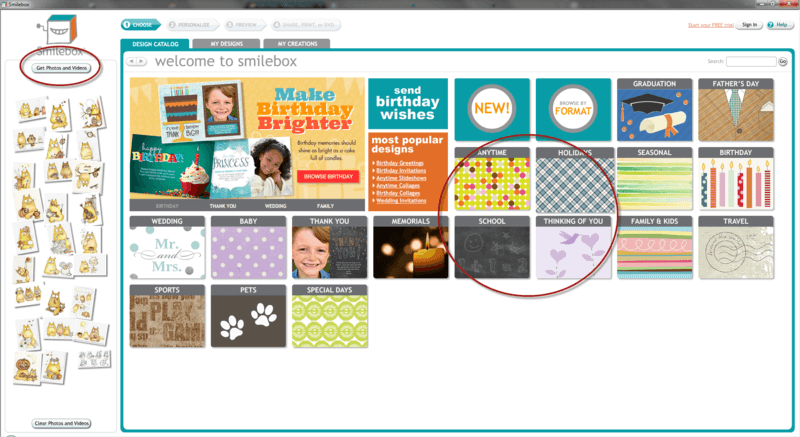
- Choose a template category: Anytime, Holidays, Birthday, Travel, etc.
- Select a collage template. Unfortunately, free templates are not numerous.
- Drag-n-drop your pictures onto template, add text and music when necessary.
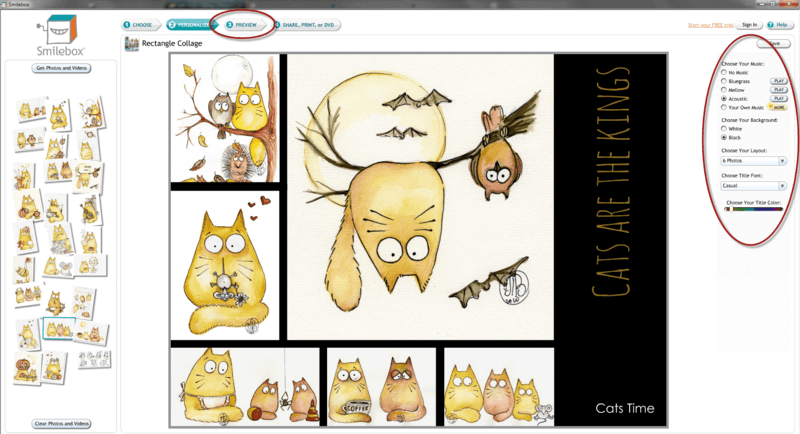
- Preview your collage by clicking on the Preview tab.
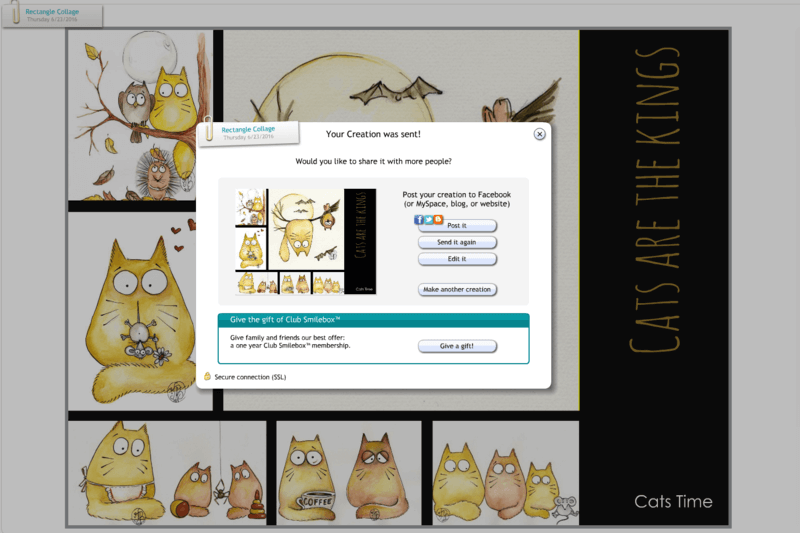
- The free version doesn’t let you save a collage onto PC, but you can email it to your friend or even to your own address for free. You just need to create a free account. In case you don’t want to send your picture, you are free to take a screenshot of a ready collage and then cut the unnecessary parts.
SEE ALSO: Photofunia: How to Edit your Photos for Fun
SEE ALSO: How to Combine Several Videos into One
PicsArt
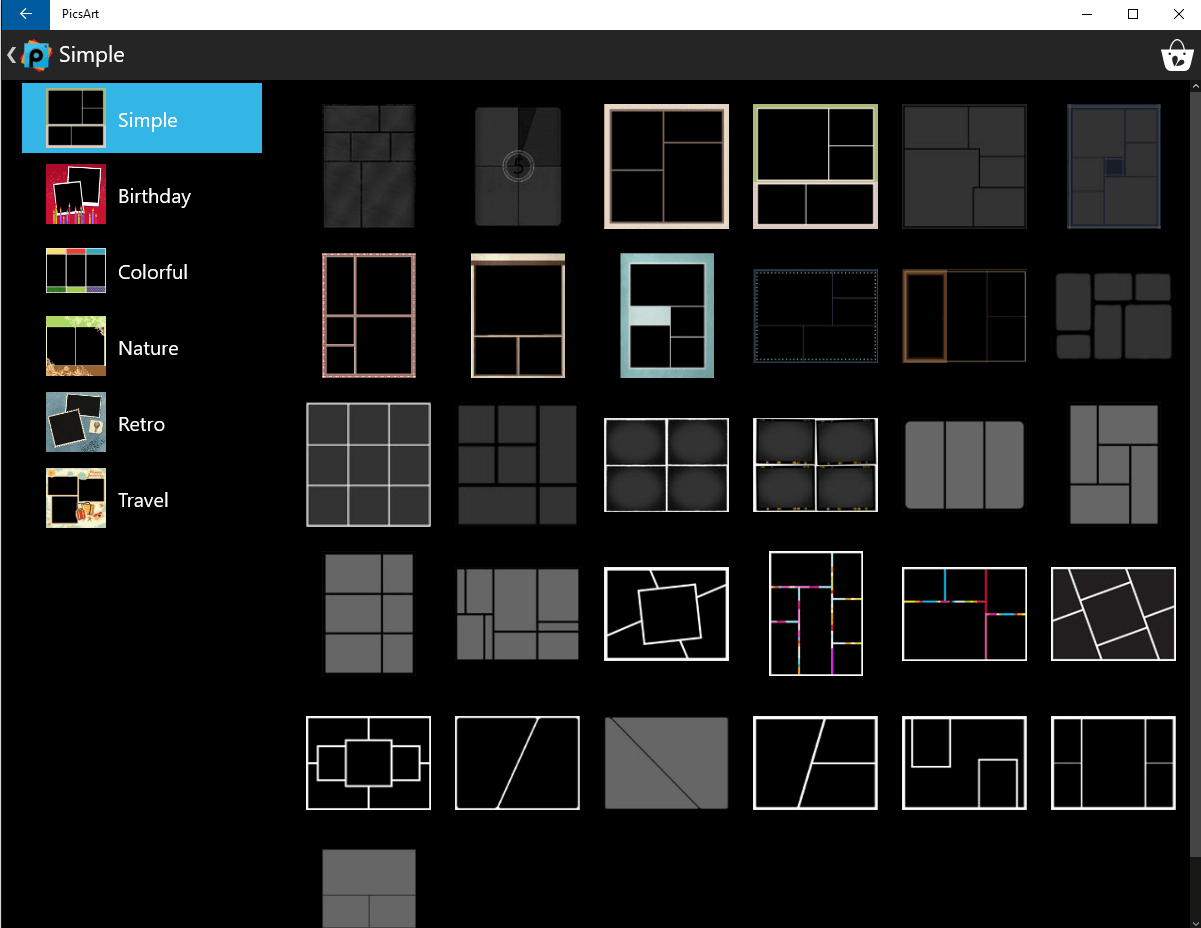
PicsArt is a modern collage maker and photo editing app for Windows 10 users. It can be installed both on desktops and tablets. It doesn’t offer too many templates, but you’ll for sure find something to your liking. To create a collage with PicsArt, you should:
- Download and install the software from the Windows Store.
- Run PicsArt, choose a collage option and a collage type: Grid, Frame, Background.
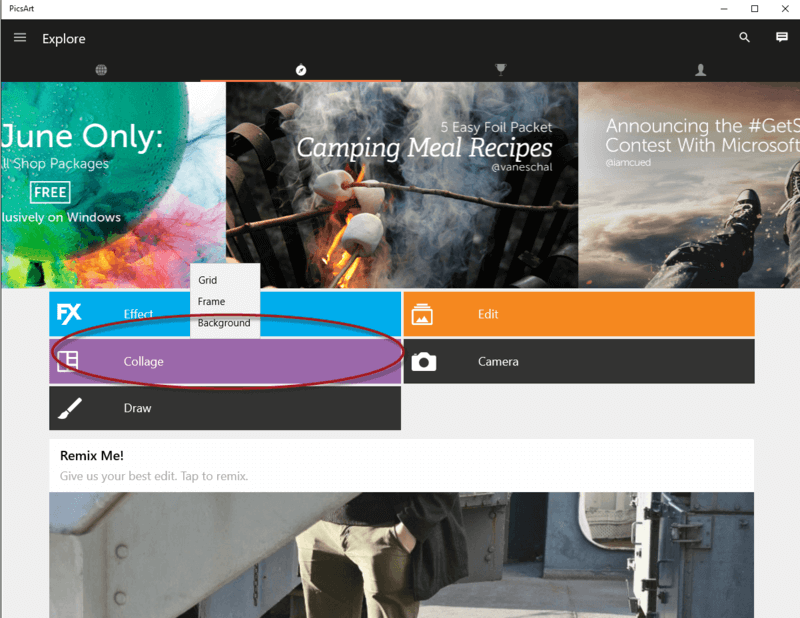
- Select one of the templates and add your pics into corresponding fields.
- If you want, you are free to apply different effect, add text, change frame and even draw something on your collage.
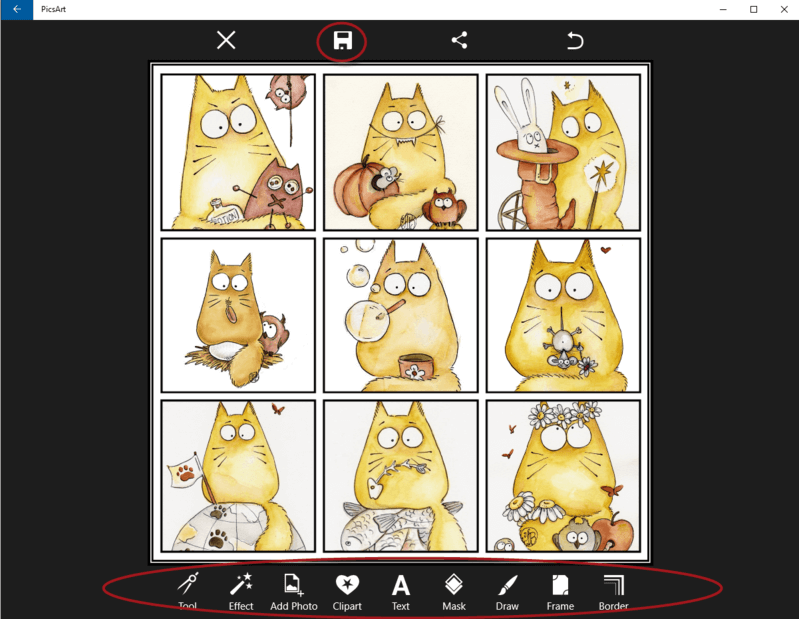
- Save the image onto PC when you finish editing.
When you are done with all your collages, it’s high time to make a cool slideshow and upload into your site. That’s where you need free Freemake Slider plugin. It helps you easily embed photos on your blog. What you need to do, is to:
- Install free Freemake Slider plugin on your WordPress blog or website.
- Click Freemake Slider button on a dashboard.
- Click the Add a new Slider button.
- Choose the Add Image option.
- Add your images and proceed to the next step.
- Now choose your slideshow style.
- Adjust the slideshow settings or leave everything as it is.
- Preview the slideshow.
- Click the Save&Publish button.
- Copy the ready code and insert it into your post.
Did you like this post? Please share it with your friends! Let them make great collages too.


