If you want to comment on some scenes in your video, you may go three ways. Add subtitles to your video, overlay captions over video or record your voice and sound for the movie. In our previous posts we reviewed text options, today we’ll focus on voice recording for video production.
What You Will Need
Depending on the soundtrack quality you want to get, you’ll need the following hardware and software equipment:
- A microphone. It can be a microphone in your PC headset, an inbuilt laptop microphone, a smartphone, a tablet, a standalone microphone for karaoke.
- A voice recorder. It may be a voice recording app, professional software, or a digital voice recorder hardware.
- [OPTIONAL] An audio editor. It can be a feature of a voice recording program or a separate audio tool.
- A video editor, special video production software that helps you to join audio and video tracks into one unit.
Step 1: Voice Recording
To record your speech, singing or background sounds, you’ll need a PC with a microphone or iPhone, iPad or Android device. Make sure that the microphone works properly and your voice sounds natural. Try to call someone and check if your partner can hear you well and there are no crunches, creaks, or any other artificial noises. If you use your PC headset, make sure that audio speakers are turned on and the cord is OK. Set audio volume to high level.
If you use a Windows PC, you can tweak your microphone settings here: Windows/Start > Control Panel> Hardware & Sounds> Sounds.
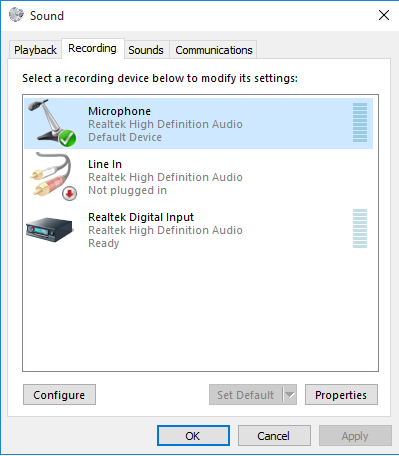
Sometimes you might need to update audio drivers or change settings for your existing audio driver. Here’s an example of a Realtek audio driver manager. You can find your audio driver settings by typing “audio” into Windows search box or re-pluging your microphone.
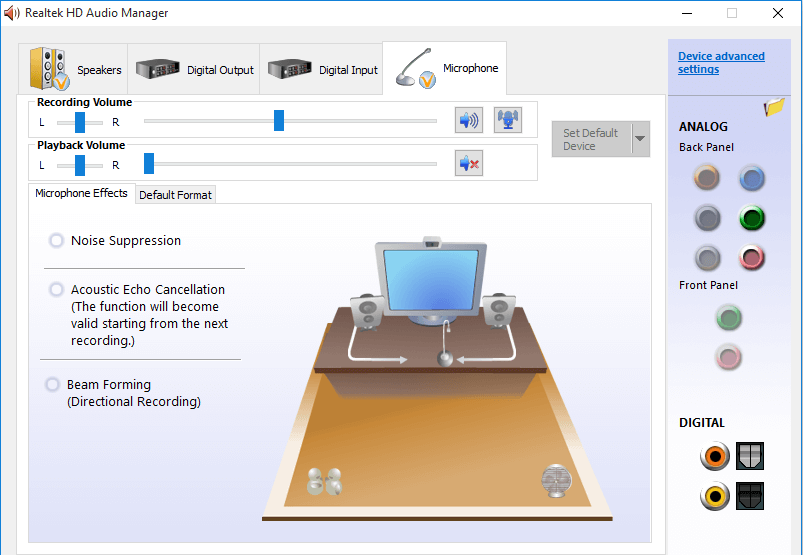
- Often, cheap and simple microphones for Windows computers don’t have great noise reduction. So you’d better record your speech in silence. Otherwise, everyone can hear your cat screaming at the background or mouse clicks.
- If you use your mobile device, make sure that microphone area isn’t covered with case or mud. Make sure that volume is high. Keep your mobile gadget closer to your mouth while recording for best results.
- Unlike desktop microphones modern smartphones like iPhone 6 or Samsung Galaxy 5 are equipped with smart noise cancellation thanks to inbuilt high-pass filter and additional microphones. So even outside at a noisy place, your phone is likely to record your voice instead of wind or passersby. But if you own an old Nokia, it will record all surrounding noises.
- Obviously, if you have a professional karaoke microphone, the quality of your soundtrack will be much better.
- If you purchase a digital audio recorder like one of Sony ICD family, no extra microphones are required.
DISCLAIMER:
Before you jump to our list of best free voice recorders for all platforms, you have to know several things about audio recording. First of all, it all depends on the level of professional performance you want to set for your video production. Below we are going to describe consumer voice recorders that try to limit noise, but they are surely inappropriate for Hollywood movies. In addition to top-notch voice recording software, if you don’t have a Hi-Fi microphone, your recordings will be of poor quality. Especially, if you plan to record an instrumental track, an average home-use microphone will fail to record all nuances of your playing.
List of Best Voice Recorders for Windows, Mac, iPhone, Android, Linux
Here’s the list of free and proven video recorders for all operational systems. Find yours below!
TRY ALSO: Zoom Video Recoderder: Record Any Zoom Meeting FREE
Windows: Microsoft Voice Recorder
Actually, Microsoft provides us with default free voice recorder which is already installed on your PC. It’s simple as it can be. There are almost no advanced settings, but you don’t have to deal with any audio editors, because Microsoft Voice Recorder has an audio cutter inside.
Pros: no installation required, inbuilt audio cut option.
Cons: records all noises such as mouse clicks, only one output format.
To use Microsoft Voice Recorder follow these steps:
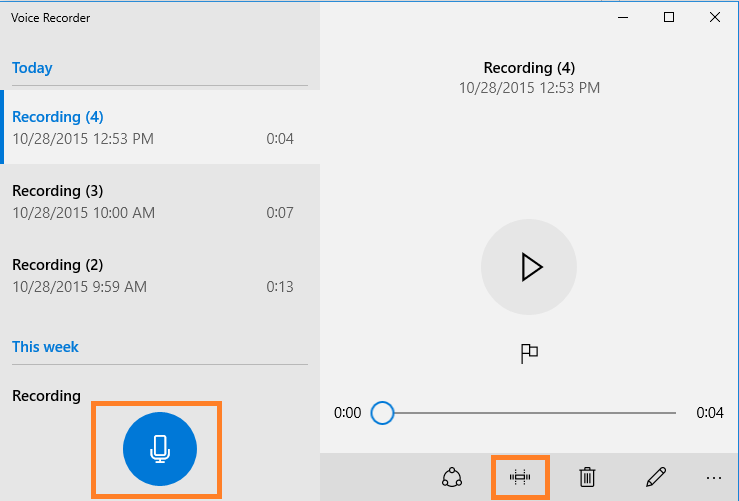
- Open Start and type Voice Recorder in the search box.
- Click on the search result. Voice Recorder will launch in a new window.
- To begin the process click on the blue microphone sign and speak into your microphone.
- To finish the tape click on the microphone sign again. Your creation will be automatically saved as M4A file in Documents > Sound Recordings.
- You can listen to your recording right from the software interface.
- [Optional] Then you can cut your recorded audio track, if you click the Edit sign (see the screenshot).
Mac, Linux: Vocaroo Online Voice Recorder
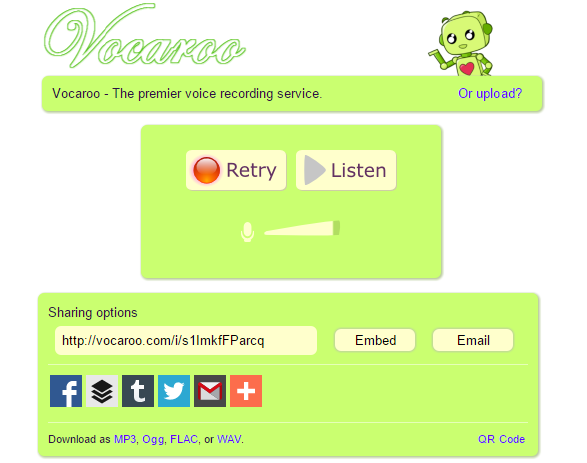
Website vocaroo.com is the best place for everyone who don’t want to mess with software downloads. Open your browser at vocaroo.com and grant access to your microphone for this tiny app.
Pros: no installation required, vast choice of output formats, including Lossless audio, audio embed option.
Cons: records all noises, no audio editing features.
How to use Vocaroo Online Voice Recorder:
- Open vocaroo.com in your browser.
- Hit the Click to Record button and say something in your microphone.
- When you’re done, hit the Click to Stop button and preview your track.
- If you like it, follow the Click here to save link. You’ll be able to save file in MP3, OGG, FLAC, or WAV format.
- [Optional] You can embed an audio recording by copy-pasting the ready code on your site or blog. Also, you may delete the recording from Vocaroo server.
Android: Default Voice Recorder
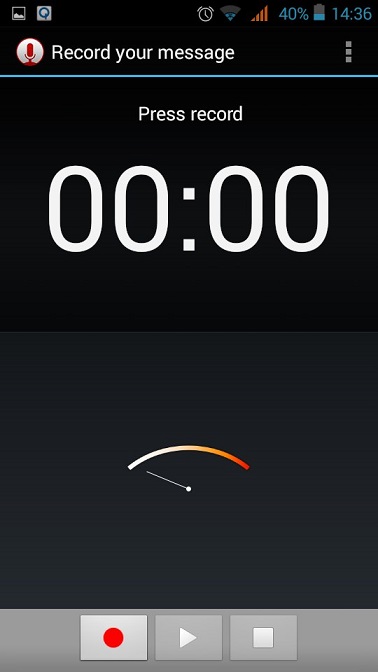
Android phones come with an inbuilt voice recorder. Thanks to it, you don’t have to install any third-party Android voice recorders. Search for “voice” on your Android, and the app will pop up.
Pros: no installation required, simple interface, not much noise, suitable for use on the go.
Cons: no audio editing features, only one output format (in my case AMR).
How to use a voice recording app on Android:
- Look for a voice recorder app on your Android phone.
- Click the red Record button and speak into your microphone.
- When you’re done, hit the Stop button and preview your track.
- If you like it, you can save the file on SD card or in your phone memory and then export it onto your PC.
To change AMR audio recording to a more common format, please use Audio Converter for Windows. Add the file, choose a new format and press “Convert”. That’s all!
iPhone: Voice Memos Recorder
Like Android, Apple gadgets also offer their own audio recording app which is called Voice Memos. On the one hand, it intuitively removes all noise from records and your voice sounds crisp. But on the other hand, you can’t record wind or some quiet background sounds.
Pros: clear natural voice recordings, includes an audio editor.
Cons: small choice of output formats, iTunes sync required.
How to use Apple Voice Memos app on iPhone:
- Look for a Voice Memos app on your iPhone.
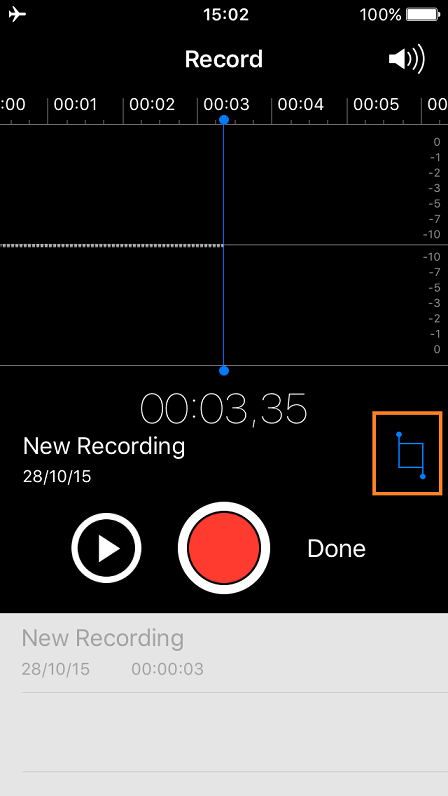
- Click the red Record button and pronounce something.
- When you’re done, hit the same button, then preview your track and save it.
- If you like it, you can sync your iPhone and desktop iTunes libraries to export your recording.
- [Optional] You can trim your audio track. There is such option, see the screenshot.
OPTIONAL STEP 1: Preview Audio in Video
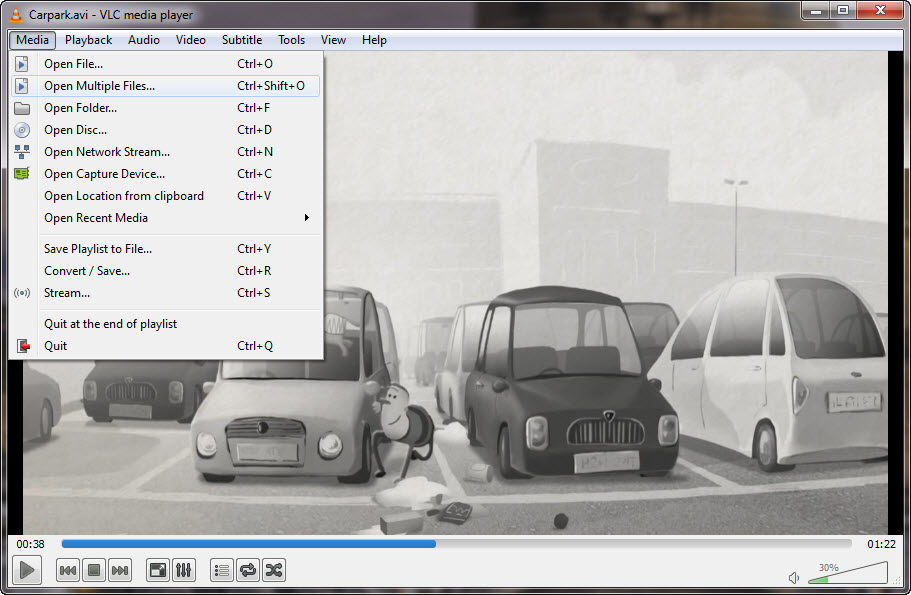
To see whether your audio matches the video, use a free VLC player. Not only it is a good multimedia player but also a well-known free video editor. This software won’t let your merge audio with video. You can only check if the sound requires editing before the final merge. Let’s see how you can do it:
- Install and run VLC on your PC or Mac.
- Click Media and select the Open Multiple Files option.
- Then click the Add button and select your video.
- Now select Show more options, then Play another media synchronously.
- Click on the Browse button and then click on Add.
- Select an audio track (your recording) and click on the Select button.
- Now click Play.
If your video comes with an original audio track, go to the Audio tab, then Audio track and select your recording.
In case, there are moments that you need to delete or edit, proceed to the next step.
Step 2: AUDIO EDITING
As you can see, not all voice recorders include the audio trimming feature. But sometimes you need to make your track shorter. For instance, you might want to get rid of Start/Stop mouse clicks. To do it, you should take advantage of an audio editing software. We reviewed earlier 5 excellent tools that help you to cut an audio file. So check our guide and select any program.
Tip! Watch this video Audacity tutorial to learn how to trim audio:
Step 3: Adding Voice Recording to Video
What you need to do next is to combine video and audio tracks. If your video file previously contained an audio path, you’d better remove audio from video. There are free video tools that can help you to achieve your goals like Freemake Video Converter. But you have to be sure that your audio and video tracks are of the same length.
Freemake Video Converter
Freemake Video Converter lets you add audio to video easily. It’s free software for Windows. Plus, it allows you to encode your creation into a number of popular video formats such as WMV, MP4, AVI, MPEG, DVD. Learn here how to burn DVD & try embedding a video onto a web page.
What you need to do is:
- Get Freemake Video Converter installer and launch it.
- Add the video.
- Click on the audio info of the clip and choose the audio you created.
- To finish your creation, choose an output format and press the Convert button.

Today we’ve described step by step how to add a soundtrack to a video. Please share this guide on Twitter and Facebook and help us amplify video production knowledge!

